
Arguably, a primary driving force behind the relentless pursuit of technological advancements is to simplify our lives and enhance the efficiency of our tasks. A remarkable stride has been taken in this direction through the collaborative efforts of Dell and Windows. Their concerted endeavors have culminated in a seamless solution to elevate multitasking on your laptop to an unparalleled level of ease. The remaining task at hand for users is to acquaint themselves with the straightforward process of activating the split screen on a Dell laptop.
When properly harnessed, this innovative feature empowers users to effortlessly manage multiple windows concurrently, enabling a fluid and uninterrupted workflow. The evolution of this function within operating systems such as Windows 10 and Windows 11 has been meticulously refined, resulting in a more expansive and immersive multitasking experience.
What sets this apart is the inherent convenience – there’s no need to invest in or install third-party software to unlock this capability. Since it’s an integral component of the system, a simple setup process is all it takes to initiate the seamless operation.
Embarking on the journey to harness this remarkable feature on your device is a breeze. Here’s all the essential information you require to effortlessly integrate and utilize this invaluable tool today!
What Is Split Screen Feature In Windows 10 And Windows 11
On average, your typical Dell user is well aware that when juggling tasks across multiple windows, manually resizing each window to fit within a comfortable view is a necessary but time-consuming effort. However, this repetitive process can quickly become a hassle and disrupt your workflow. Enter the split screen feature—a game-changer in this scenario.
The split screen feature accomplishes the same goal but with a significant twist. It automates the adjustment process seamlessly and elegantly. Once you’ve mastered the art of splitting the screen on your Dell laptop, you gain the ability to effortlessly access and oversee up to four distinct windows simultaneously, all displayed harmoniously in one continuous view.
In essence, the split screen functionality serves as a remarkable tool that empowers you to smoothly navigate and interact with multiple programs on your laptop. It eliminates the need for painstakingly readjusting window dimensions and eradicates the time-wasting chore of rearranging windows.
In summary, the split screen feature stands as an ingenious solution, enabling you to efficiently manage multiple applications on your Dell laptop without the frustration of constant resizing and the unnecessary expenditure of time on window manipulation.
How Split Screen Feature On Windows 10 And Windows 11 Works
When activating the split screen feature on your Dell laptop, you authorize the device to execute a series of pre-programmed actions. Consequently, whenever you initiate two windows, this program becomes operational. Its primary function is to automatically partition your screen into two equal halves, assigning one window to each segment.
In the event of opening an additional third window, the split screen program maintains one-half of your screen undisturbed, while the other half is further divided horizontally. The new window is then seamlessly integrated into this newly generated section.
Upon introducing a fourth window, the program replicates this process for the initially untouched screen portion. This enables you to effortlessly navigate and interact with all open windows without any interruption.
What truly distinguishes the split screen feature is its remarkable ability to retain its configuration, as long as you refrain from maximizing any of the windows. This persistence remains unaffected even when minimizing existing windows or introducing new ones into the mix.
What To Keep In Mind When Using Split Screen On Dell Laptop
While unquestionably beneficial, the split-screen functionality possesses certain constraints worth considering. It’s imperative to acknowledge that altering the view from side-by-side to top and bottom isn’t feasible within a two-window arrangement.
Nevertheless, it’s noteworthy that this transition becomes possible with a three-window configuration. Having addressed this, let’s delve into the steps for activating this impressive attribute on your Dell laptop!
How To Do Split Screen On Dell Laptop
To enable split-screen mode on your Dell laptop, simply activate the Multitasking feature on your device. This can be accomplished by:
Step First – Access Your Laptop Settings
Navigate to the “Settings” section on your Dell computer. You can easily access this area by utilizing the search function within the Start Menu or by directly employing the keyboard shortcut “Windows key + I.”
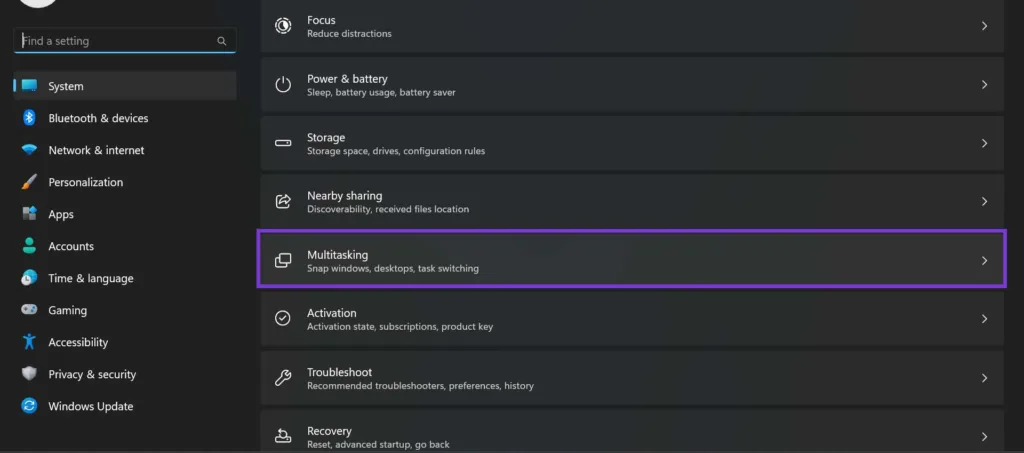
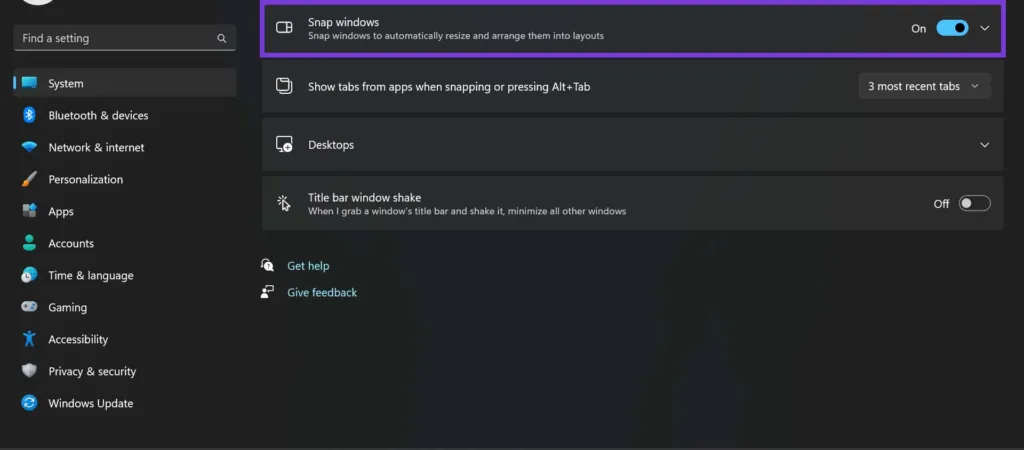
Step Second – Activate The Snap Windows Toggle
After accessing the Multitasking settings on your device, locate the “Snap Windows” option and activate the toggle. You should also ensure that all the toggles within this option are turned on. Alternatively, you have the flexibility to choose which features to enable based on your personal user preferences.
Split Screen On Dell Laptop Using Keyboard Shortcuts
Enhance your Dell laptop experience by utilizing keyboard shortcuts to effortlessly rearrange open windows. Streamline the window-dragging process with a sequence of simple actions. Here’s the step-by-step guide:
1. Open the desired windows you want to arrange on your screen.
2. To move a specific window to the left edge, click on it once to highlight it.
3. Employ the keyboard shortcut “Windows key + Left Arrow” to trigger the movement.
4. Conversely, to shift a window to the right, use the combination “Windows key + Right Arrow”.
For a more efficient approach when dealing with multiple windows, such as organizing them simultaneously into the top-left, top-right, bottom-right, and bottom-left corners of your screen:
1. Initiate the process with the “Windows key + Left Arrow” shortcut.
2. While continuing to hold the Windows key, press the “Up” arrow button.
Mastering these keyboard shortcuts empowers you to effortlessly manage your windows on a Dell laptop, boosting your productivity and ease of use.
How To Do Split Screen on Dell Laptop | Final Verdicts
Having mastered the art of effectively splitting your Dell laptop screen, you’re poised to elevate your productivity and reduce stress while working on your device. It’s important to recognize that the process for activating split screens on Dell laptops mirrors that of all other Windows-operating-system-based devices. This means you can confidently embrace this efficiency-enhancing technique without worry, whether you transition to a new device or continue utilizing this feature. Your workflow just got a major upgrade, and it’s here to stay!